
If your Keurig coffee maker still shows the Descale light after cleaning, I would first assume the brewer did not complete its full descale mode.
A normal brew cycle with vinegar or descaling solution may clean part of the water path, but many newer Keurig models need a specific button sequence and rinse pattern before the warning clears.
The most reliable fix is simple: enter the correct descale mode for your model, run the solution cycle until the reservoir asks for water, then run fresh-water rinse cycles until the machine exits descale mode on its own.
Keurig says descaling removes calcium deposits that build up inside the brewer and can affect performance, and the company recommends descaling every 3 to 6 months, or when the Descale light appears on select brewers.
First, Check Your Keurig Model
The fastest fix depends on the model. Keurig has several button layouts, and using the wrong reset sequence can waste a full tank of solution.
K-Supreme, K-Supreme Plus, K-Slim, And Similar Models
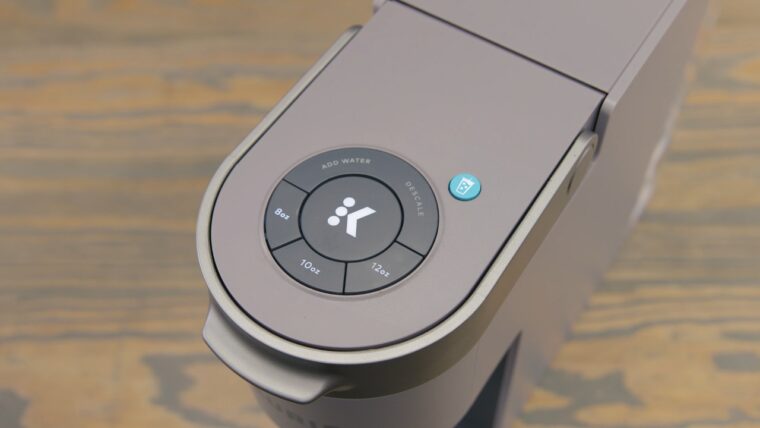
For many newer single-serve models, I start with the brewer plugged in but powered off. Then I press and hold the 8 oz and 12 oz buttons together for 3 seconds to activate Descale Mode. Keurig describes that 8 oz plus 12 oz sequence in its descale mode instructions.
Once the light starts flashing, I press the flashing brew or size button and let the brewer run the solution through the machine. I do not add a K-Cup pod.
K-Duo And K-Duo Essentials Models
K-Duo machines can be different because they have both single-serve and carafe sides. Keurig’s K-Duo Essentials guide says Descale Mode is entered by pressing and holding the CUPS and OZ buttons together for 3 seconds, then running the single-serve and carafe descale steps.
If the K-Duo descale light will not turn off, check whether both sides have been completed. Cleaning only the single-serve side can leave the brewer thinking the job is unfinished.
Older Keurig Models Without A Descale Mode
Older models may not have a dedicated descale mode. In that case, I run repeated large-cup cycles with descaling solution, let the brewer sit according to the product directions, then flush several reservoirs of fresh water.
If the model has a reset sequence, check the use and care guide for that exact brewer.
My Step-By-Step Fix For A Stuck Descale Light

I use a slower, more controlled process when the first attempt fails. Randomly brewing vinegar again and again rarely solves the problem.
1. Empty And Reset The Brewer
I remove the pod, empty the reservoir, dump the drip tray, and power the brewer off. Then I unplug it for 5-10 minutes.
That short pause will not dissolve scale, but it can clear a confused control state before I run the proper descale cycle again. After plugging it back in, I do not brew coffee. I go straight into descale mode.
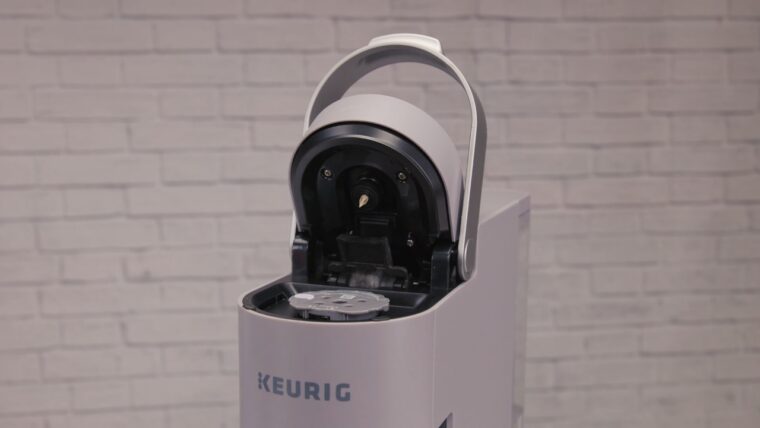
2. Clean The Needle And Pod Holder First
If water flow is weak, descaling alone may not fix the alert. I lift the handle, remove the pod holder if the model allows it, rinse it, and clear coffee grounds from the exit needle area.
I avoid sharp metal tools inside the needle. A paper clip can work on some Keurig needles, but I use it gently because the goal is to clear residue, not widen or damage the opening.
3. Use Descaling Solution For The Second Attempt
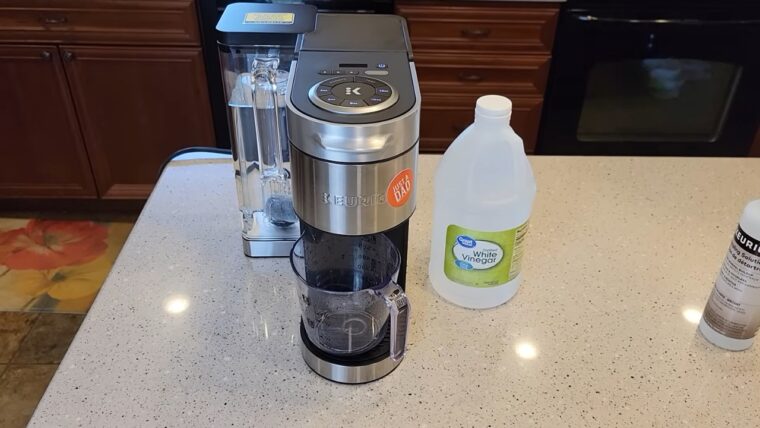
White vinegar can help with light scale, but when the Descale light refuses to clear, I prefer Keurig descaling solution or another coffee-maker-safe descaler.
Vinegar odor lingers, and a weak mix may not handle heavy mineral buildup.
Hard water matters here. The U.S. Geological Survey explains that water hardness comes from dissolved calcium and magnesium, which is why some homes see scale return faster than others. The water hardness explanation is a useful reference if your brewer needs frequent cleaning.
4. Enter Descale Mode Before Running The Solution
The most common mistake I see is adding solution, then pressing brew like normal. On newer Keurigs, that can clean the water path but fail to satisfy the descale alert.
I power the machine off while leaving it plugged in. Then I hold the correct buttons for the model, usually 8 oz plus 12 oz on K-Supreme-style brewers, or CUPS plus OZ on some K-Duo brewers.
5. Keep Running Cycles Until Add Water Appears
I place a large ceramic mug under the spout, run one cycle, dump the mug, then repeat. I do not stop just because some solution has passed through.
The brewer needs to reach the point where the reservoir is low enough to trigger the next stage. Stopping halfway can leave the light on.
6. Rinse More Than Feels Necessary
After the solution cycle, I rinse the reservoir, fill it with fresh water, and run rinse cycles until the brewer exits descale mode. For many stuck-light cases, the missing step is not the cleaner. It is the rinse.
I usually expect several full mugs of water to pass through before the light clears. If the machine still smells like vinegar or descaler, I keep rinsing.
What If The Descale Light Still Will Not Turn Off?
View this post on Instagram
If the light remains after one complete solution cycle and one complete rinse cycle, I repeat the full descale process once.
Keurig’s K-Supreme Plus Smart user guide says that if a brewer still produces only a partial cup after the descale procedure has been repeated 2 times, customer service should be contacted through official support channels.
I use the same logic for a stubborn descale warning. Two proper descale attempts are reasonable. After that, the issue may be a sensor, pump, heating system, internal blockage, or control-board fault.
Signs The Problem Is Not Just Scale
A stuck light is annoying, but poor brewing behavior gives better clues.
When several of those happen together, I stop repeating cleaner cycles. Too much descaler without proper rinsing can create taste problems and may not solve a mechanical fault. I use a descaling solution when the light is stuck. Vinegar is cheaper and easier to find, but it is not my first choice for a stubborn stain. Keurig says the scale is non-toxic, but when left unattended, it can hinder brewer performance. That matches what I see in real use: slower flow, shorter cups, odd noises, and repeated descale alerts. I would rather prevent the warning than fight it again. Filtered water can reduce mineral buildup, but it does not make descaling unnecessary. Many filters improve taste and reduce some contaminants, but they do not always remove all hardness minerals. The biggest mistake is treating every Keurig the same. A K-Supreme, K-Duo, K-Elite, K-Mini, and older B70-style brewer can behave differently. When I troubleshoot, I slow down and let the brewer complete its programmed sequence. Speed is usually the enemy here. I consider replacement when the brewer is older, out of warranty, repeatedly brews partial cups, and still fails after 2 complete descaling attempts. A repair may cost more than a basic new Keurig, especially for entry-level models. Before replacing it, check the serial number, warranty status, and official support page for the exact model. Keurig lists 866-901-BREW (2739) on its descaling support page. When a Keurig descale fix does not work, I do not keep brewing vinegar randomly. I restart with the correct descale mode for the exact model, clean the needle and pod holder, run a proper descaling solution cycle, then rinse until the brewer exits the alert on its own. Most stuck Descale lights come from an incomplete process, not a ruined coffee maker. If the warning stays on after 2 full descale attempts, the smarter move is to contact Keurig support or weigh replacement against repair cost.
Should I Use Vinegar Or Keurig Descaling Solution?
Option
Best For
Downsides
Keurig descaling solution
Stuck Descale light, heavy scale, newer models
Costs more than vinegar
White vinegar
Light maintenance, older brewers, budget cleaning
Strong odor, needs extra rinsing
Citric acid solution
Mineral buildup with less vinegar smell
Must be mixed correctly
Plain water
Rinsing only
Will not dissolve scale
How I Prevent The Descale Light From Coming Back Too Soon
Common Mistakes That Keep The Descale Light On
When To Replace The Keurig
FAQs
Summary